Preparing for a Manaslu Base Camp trek and for the Manaslu Circuit trek has to start much earlier than just packing a duffel bag in Kathmandu. The trek is not challenging technically, in a mountaineering sense. Still, it involves trekking day after day in remote valleys, in a simple mountain setting with thinner air and the passage of Larkya La at about 5,106 m. This means that the effort will accumulate throughout the trek. A trekker feeling fit on the second day of the trek will struggle a lot more on the tenth day if his/her body, feet, gear and recovery process were never properly prepared for trekking one mountain day after another.
Manaslu Base Camp is not a destination by itself for most itineraries. It is usually seen as a side trek done from Samagaon during an acclimatization day along the Manaslu Circuit trek. Whether the trekker reaches the Base Camp or not depends on the circumstances, on the acclimatization process of the trekker, and the opinion of the guide.
Preparation, then, must focus on the full circuit - becoming physically fit enough to endure five to eight hours a day repeatedly, training legs for climbing and descending, breaking in footwear, learning how to properly pack a daypack, becoming educated about altitude, preparing for cold weather in Dharamsala and Larkya La, getting the restricted area permits sorted out, testing out gear, and arriving in Nepal fit rather than worn out from preparation.
Preparation time should realistically fall between 8 and 12 weeks for an active individual, and about 12 and 16 weeks for a more sedentary starting point. Modern training programs for Manaslu expeditions share these guidelines by stressing sustained aerobic capacity, hill training, weighted walking, and back-to-back training rather than just gym fitness alone. The preparation covered here is intended for the three months preceding your trip until the morning of your departure from Kathmandu.
How Much Preparation Do You Actually Need for the Manaslu Circuit Trek?
One way of preparing for the climb to Manaslu is to stop viewing the trek as an exhausting single-day pass. The clear peak would be Larkya La, but the total amount of walking before the pass is the factor which makes the trek difficult.
Depending on the route chosen, the trekkers have to spend several consecutive days walking in the valley of the Budhi Gandaki River until the higher villages of Namrung, Lho, Shyala, Samagaon, Samdo and Dharamsala are reached. As the elevation grows, walking becomes slower. The appetite decreases. Sleep gets worse. Cold matters much more. When the group arrives at Larkya La, the legs carry the result of more than a week-long trek.
This is the reason why preparation has to solve several different issues at once.
Preparation area
When to begin
What you need to achieve
General aerobic fitness
10-12+ weeks before
Walk for several hours without becoming exhausted
Leg and core strength
10-12 weeks before
Control repeated climbs and long descents
Hill/stair training
8-10 weeks before
Become comfortable with sustained uphill work
Weighted daypack training
6-8 weeks before
Carry your actual trail load comfortably
Back-to-back hiking
4-8 weeks before
Recover enough to walk again the following morning
Boots and foot preparation
6-8+ weeks before
Eliminate pressure points before Nepal-
Medical preparation
4-8 weeks before
Review health, prescriptions and altitude questions
Insurance/documentation
Before departure
Ensure trekking and evacuation coverage is appropriate
Gear testing
3-6 weeks before
Know that every important item works
Final taper
Last 7-10 days
Arrive rested rather than overtrained
What You Are Physically Preparing For on the Manaslu Circuit
Speed does not matter.
You are preparing yourself to walk in a controlled manner for hours, eat and drink while doing so, sleep well, and then repeat everything the next day.
A marathon athlete might be very aerobically conditioned but find out that going down a steep hill makes his knees sore. A bodybuilder can be very strong in his legs, but not be able to walk for six hours. Somebody who goes on weekend hikes all year round can have very good trail conditioning without having done much gym training.
The relevant question is:
"Am I fit?" or "Can I walk uphill and downhill for six hours today and do well tomorrow?" The second one comes much closer to reality in Manaslu.
Why Larkya La Changes the Preparation Standard
Larkya La is estimated at 5,106 m by the Manaslu Trek guides. Larkya La Day is traditionally one of the longer days of the trekking schedule, as it may take eight to ten hours or more.
It is not the technical climbing that will be your enemy. The difficulty lies in combining:
an early start,
cold temperatures,
lack of oxygen,
walking,
a possible snow or ice cover depending on the weather conditions,
lack of shelter while crossing the ridge, and
a long downhill towards Bhimthang afterwards.
Preparation for ascending only means completing half of the task. It will be important to get ready for descending as well.
Where Manaslu Base Camp Fits Into the Circuit
In most itineraries for Manaslu Circuit trekking, Samagaon is a major acclimatization point. A trek to Manaslu Base Camp can be done on this day, which will help with climbing up and sleeping lower at Samagaon. In some itineraries, shorter acclimatization hikes like the Birendra Lake or another higher place nearby can be considered as well. It cannot be confused with the purpose of this activity.
The hike is effective as it provides hikers with additional activity and acclimatization without sleeping at a higher altitude. This is not a required summit-type activity for everyone. For those who suffer from headaches, nausea, fatigue, dizziness or poor acclimatization, going for a longer trek to Manaslu Base Camp just because this is included in the itinerary makes no sense.
When Should a Beginner Start Preparing?
A healthy person who does not exercise much now should give himself a minimum of 12 weeks, while 16 weeks is better if he has body weight issues, old injuries, knee issues or very poor cardiovascular fitness that requires a gradual improvement.
Early start means gradual build-up of training volume.
The reason is that one of the most disastrous preparations is doing absolutely nothing for two months and then doing two seven-hour hikes three weeks before the Nepal adventure. Cardiovascular fitness improves quickly, but feet, tendons, knees and connective tissues require gradual load.
When Should an Already-Fit Trekker Start Preparing?
An active runner, cyclist, footballer, gym person or hiker might not need months of basic preparation. Even so, give yourself 8 weeks of trek preparation.
During this time, transition from general fitness to:
walking uphill;
descending;
stair climbing;
unlevel ground;
trekking poles;
heavy day packs;
prolonged movement; and
training on successive days.
Fitness cuts down the time for preparation but does not eliminate the need for specificity.
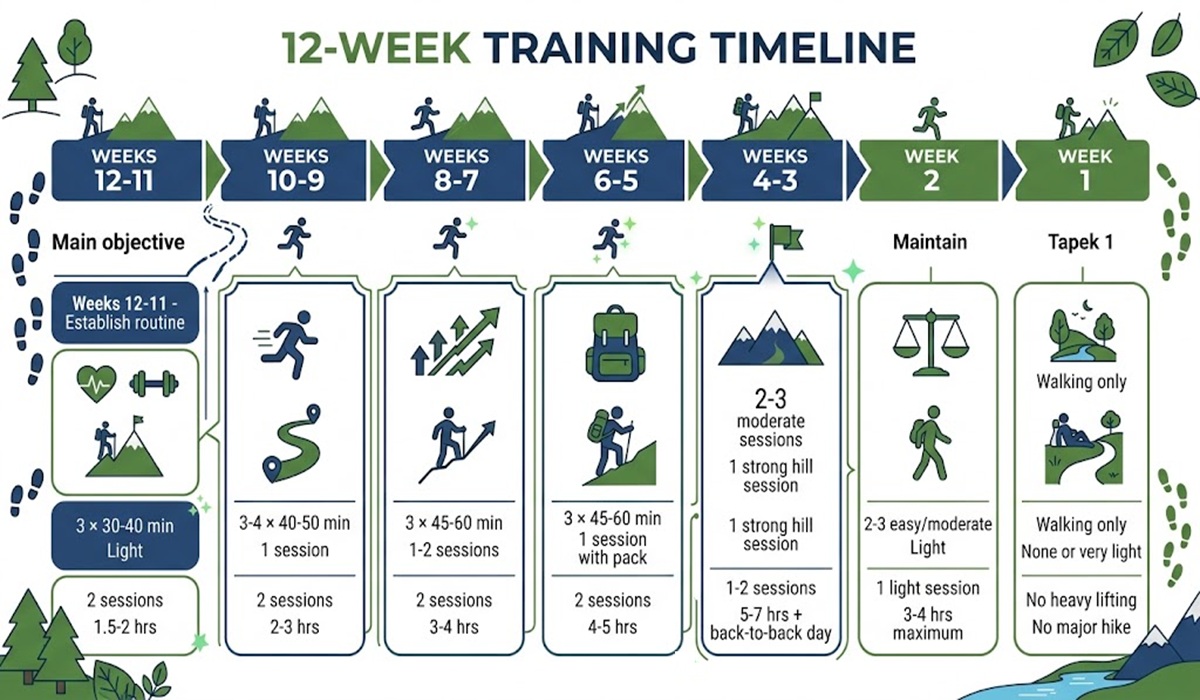
12-Week Manaslu Circuit Trek Training Plan Before Departure
12 Week Training plan for Manalsu Circuit Trek
Twelve weeks is sufficient time for conditioning without placing too much strain on the body all at once.
Conditioning is the key here, not exhaustion. Conditioning will become increasingly specific as the date of departure draws nearer, reaching its peak a few weeks prior to departure for Nepal.
12-Week Training Timeline
Weeks
Main objective
Cardio
Hills / stairs
Strength
Long hike
12-11
Establish routine
3 × 30-40 min
Light
2 sessions
1.5-2 hrs
10-9
Build aerobic base
3-4 × 40-50 min
1 session
2 sessions
2-3 hrs
8-7
Add elevation
3 × 45-60 min
1-2 sessions
2 sessions
3-4 hrs
6-5
Add pack weight
3 × 45-60 min
1 session with pack
2 sessions
4-5 hrs
4-3
Trek-specific peak
2-3 moderate sessions
1 strong hill session
1-2 sessions
5-7 hrs + back-to-back day
2
Maintain
2-3 easy/moderate
Light
1 light session
3-4 hrs maximum
1
Taper
Walking only
None or very light
No heavy lifting
No major hike
This plan is a template rather than a doctor's prescription. Previous injuries, aging, past training and cardiovascular fitness should alter your approach in terms of increasing volumes.
Weeks 12-9: Build Your Aerobic Base
The initial month should seem almost excessively light. This was meant to be the case. Work on 3-4 aerobic workouts each week for 30-50 minutes. Walking, cycling, jogging, swimming, elliptical machines and low-intensity stair climbing can be done.
Spending most of your time at a level of exertion when breathing is elevated but conversation is still possible is your aim for this stage. Avoid exhaustion. Building up your body's capability for sustained aerobic output is the end goal here.
Perform one weekend walk, starting at 90-120 minutes and gradually extending to 3 hours. At the same time, start performing very basic training for your legs and core twice per week.
The best exercises are:
Squats;
Split squats;
Walking lunges;
Reverse lunges;
Step-ups;
Calf raises;
Glute bridges;
Side planks;
Basic planks;
Controlled step-downs.
Step-downs must be highlighted, as they help train eccentric control essential in lengthy Himalayan descents.
Weeks 8-5: Add Hills, Stairs and Leg Strength
General cardiovascular fitness starts to become trek-specific at this stage. Each week needs one training session where the trekker moves uphill for a prolonged period. If there are hills available, use them. If not, then stairs or an inclined treadmill will be good alternatives.
It would start with 30-40 minutes and progress towards about 60 minutes. The trekker should also start carrying his trekking daypack.
He should begin light with, say, 4-5 kg rather than filling 10 kg into his pack right away. His pack should contain all the items he is likely to need for trekking:
water;
waterproof shell;
insulation;
snacks;
phone/camera;
his personal medication;
sun protection;
plus other necessities.
It is important to acclimatize the shoulders, back and hips to his own trekking pack, not demonstrate how much weight he can carry.
The current training recommendations for Manaslu treks put the daypack weights within 4-8 kg depending on individual trekker and porter arrangement, but emphasize that intentionally carrying much more than the trekking load brings no benefits.
Weeks 4-3: Train on Back-to-Back Trekking Days
This step is much more important than an additional difficult workout in the gym. Make sure that you have completed at least one weekend where you do:
Saturday: 5-6 hour hill walk
Sunday: 3-4 hour walk
In due time, a properly conditioned trekker can start doing:
Saturday: 6-7 hours
Sunday: 4-5 hours
The key here is Sunday morning. You will not entirely recover from your efforts. That is the idea. The Manaslu Circuit will not offer you five days for recovery after every hard walk. Your body has to learn how to move with slight residual fatigue.
Use the hikes to try everything at once:
boots;
insoles;
socks;
hiking poles;
backpack;
water bottle;
raincoat;
snacks;
sunglasses; and
layering.
Your training will include both physical fitness and equipment breakdown testing.
Weeks 2-1: Reduce Training and Arrive With Fresh Legs
Do not try to gain extra fitness during the last week. Adaptations for fitness come after training, not during your last-ditch effort at working out.
Decrease overall training by quite a bit in the last 7-10 days. Easy walks and stretching are good. Heavy squats, max sprints, stairs for hours and hiking for seven hours on weekends are not.
The goal for the flight to Nepal should be to be: fit and well-rested and not: fit, sore and sleep-deprived.
Sample Monday-to-Sunday Training Week
Practical weeks during weeks 5-8 might be structured like this:
Day
Training
Monday
Full rest or 30-minute gentle walk
Tuesday
45-60 min moderate cardio
Wednesday
Leg + core strength, 35-45 min
Thursday
Hills/stairs, 45-60 min
Friday
Rest or easy mobility
Saturday
4-5 hour loaded hike
Sunday
60-120 min easy walking
At peak weeks, Sunday could become a long second hike.
What Fitness Level Should You Reach Before Flying to Nepal?
No lab number will ensure your success, but helpful markers are having the ability to:
walk 5-7 hours without experiencing extreme fatigue;
climb hillside/stairs steadily for 45- 60 minutes;
wear your pack comfortably for several hours;
descend for long stretches without continuous knee pain;
exercise the next day again; and
recover without lying in bed for several days.
These activities do not have to be done quickly, but they have to be done.
Train for the Trail You Will Actually Walk, Not Just for General Fitness
Train Uphill for the Long Climbs Beyond Namrung
The training for Manaslu Circuit should be controlled and not explosive. You do not need to ascend as quickly as possible; you should develop a speed that would be comfortable for you to maintain throughout several hours of the journey. While ascending in the hills, take shorter steps, hold your body straight and refrain from making too big steps, which will overload the quadriceps. In case you train on the stairs, do not run several flights up and then have a complete rest; try to do it in a controlled rhythm.
At first, you may ascend uphill for 20-30 minutes without any additional load. As soon as it becomes comfortable for you, increase the time to 30-40 minutes. After several weeks, add a backpack with a light load and increase the training time to 45-60 minutes with the weight of the day pack you expect to carry during the journey. It will be more effective than starting with a heavy load right away, since you aim to train your climbing endurance without knee and back overload.
Train Your Knees for the Descent From Larkya La
For most trekkers, climbing is the primary concern because it is more difficult in the training phase. Going down provides a new challenge.
The quads have to constantly manage the load of your body when braking during descent.
Train it specifically.
Some good exercises for that include:
step-downs off a sturdy platform;
reverse lunges;
split squats;
walking downhill;
descending stairs;
and one-legged balance exercises.
Do not start with a lot of volume of the downhill exercises at once, since eccentric workouts can lead to great muscle soreness.
Practice 5-7 Hour Hiking Days Before Nepal
Before heading to Nepal, go for at least one or two training hikes that would last for about five to seven hours. The hikes do not have to emulate Himalayan altitudes. Their main objective is to help you understand how your body, gear, and food intake will behave after several consecutive hours of walking.
A lot of minor issues become noticeable only after the fourth or fifth hour of walking, but not in the first two hours of a training hike. For example, your shoulder straps can irritate, your socks can bunch up under your toes, your breakfast may turn out to be not enough, your water bottle may be difficult to access, or your trekking-pole straps may irritate your hands. During long training hikes you will get an opportunity to detect and solve these problems before leaving home.
Also, this is the time when you should try your trekking outfit. Wear the boots, socks and clothes you are going to use, carry your regular backpack, use trekking poles and eat and drink on the go. Finding out that something does not work during training hikes is good. Finding out that something does not work between Samdo and Dharamsala is harder to solve.
Why You Should Train Two Long Days Back-to-Back
The second day brings up another set of weaknesses. On the first day, the energy masks problems. On the second day, stiffness in the calves, sore feet, and tired hips point out whether your preparation is doing the job. Also, you find out:
how much food you require after your walk;
whether you require stretching;
whether your feet get hot spots;
and whether your shoes fit well even when your feet are a little swollen.
How Much Weight Should You Carry During Training?
During training, carry roughly what you actually intend to carry. If your porter is going to carry your big bag, there is no need to train yourself by carrying a 15 kg pack. Your normal daypack can hold several kilos of water, layers, and your own gear. Gradually work into the range you require. Not heavier means not necessarily better training. Heavier than necessary just means more stress on the ankles, knees, and lower back.
Stair Training When You Have No Mountains Near Home
Flatland hikers can still get ready.
Use:
apartment building stairs;
stadium stairs;
stair machines;
parking garage stairs;
treadmill with an incline; or
repeated climbs up the biggest hill available.
An hour of regulated stair climbing is better preparation for Manaslu than an hour of random, intense gym workouts with no relevance to hiking.
Trekking-Pole Practice Before the Trek
Do not take new poles to Nepal if you do not know how to use them. Train:
to adjust the pole height;
to use the wrist straps properly;
to shorten the poles on steeper ascents;
to lengthen them slightly on descents;
to move with alternating pole rhythm;
and to pack them quickly when not needed on the trail.
Poles are especially useful in balancing some weight on descents, but improper use makes them cumbersome.
Prepare Your Body for Altitude Before Manaslu but Know What Training Cannot Do
Though cardiovascular training will help in making the trek less physically difficult, it will not guarantee that a trekker will be immune to altitude sickness. An individual may have good endurance, strong legs, and a lot of preparation time but still suffer from acute mountain sickness. The same applies to a slower recreational trekker who can acclimatize without any problems. Physical condition and altitude tolerance are two different things.
As soon as a trekker reaches higher sleeping altitudes, his approach needs to be changed. In this case, it is very important to walk slowly and carefully, taking into account recovery and small symptoms. A slow pace helps to avoid any unnecessary exertion and also helps to realize if fatigue is just the natural exhaustion caused by trekking or if it is getting worse and worse.
Above 3,000 m, a gradual ascent becomes crucial. There is one rule concerning altitude that can be used to understand how to acclimatize properly. It consists of not increasing the sleeping altitude by more than 500 m per day, if possible, and spending one extra acclimatization night for every 1,000 m.
Fitness Does Not Make You Immune to Altitude Sickness
One of the most common mistakes a fit hiker could make is assuming that fitness is an advantage at altitude. But it is not. The marathon runner, the cyclist or the gym user can certainly walk faster than other members of the party but will experience headache, nausea, dizziness, or other symptoms.
This means that you should not take your pace at low altitude as a standard as soon as you get into high altitudes. Particularly above Samagaon, it makes more sense to walk slowly rather than try to walk at the pace you were walking in the lower valley. The point is not to arrive earlier. The point is to arrive with enough energy left to keep going tomorrow.
Why Samagaon Is More Than Just a Rest Day
Referring to the additional day at Samagaon as a "rest day" may be misleading. Instead, for many trekkers, it is better to call it an active acclimatization day.
Rather than staying inside the lodge throughout the day, trekkers may go up to a higher altitude and come back down to spend another night in Samagaon. In this way, the body is introduced to higher altitude without an immediate change in the altitude at which they sleep. This climbing high and sleeping low technique is one of the main reasons why Samagaon is so important before going further up to Samdo and Larkya La.
The second part of the day must be treated as a recovery period. Have your meal, rehydrate, check for symptoms, dry your wet clothes, and prepare yourself for the next leg of the journey. The right acclimatization day will help you get ready for your upcoming route.
Using the Manaslu Base Camp Hike as an Acclimatization Side Trip
If the trekkers have been feeling good during their acclimatization and are doing fine, the walk from Samagaon to Manaslu Base Camp could make the acclimatization day in Samagaon a big trekking day. Hence, it must be taken very seriously, even if they go back to the same lodge.
Pack your proper daypack. Have water, snacks, a shell jacket, insulation, warm gloves, a hat, sun cream, sunglasses, trekking poles, medications as per the requirements and also carry protection from rain and snow based on the weather conditions. The weather and temperatures could vary greatly depending on the elevation.
But the most crucial thing in this case is the mental preparation that they will have to go through. Reaching Manaslu Base Camp shouldn’t become more crucial than going ahead with a safe acclimatization process for the circuit. In case of symptoms, bad weather or any other situation, if the guide feels going further isn’t appropriate, then they have to make a decision to return.
Symptoms You Must Tell Your Guide About Immediately
You must report altitude symptoms while they are in their early stages and not when they become hard to handle several hours down the line. Headaches that persist, nausea, vomiting, unusual weakness, dizziness, poor coordination, confusion, breathlessness while resting or inability to take in food and drink are among them.
In addition, a worsening cough, exhaustion or difficulty walking should be taken into account, particularly if these are clearly different from the usual exhaustion one feels after trekking for a day.
Pulse oximeters will offer additional information, but trekkers should not get hung up on one particular oxygen saturation figure. The readings fluctuate depending on altitude, blood circulation, cold fingers, equipment quality and measurement methods. Symptoms, behavior and general condition are more significant than passing a certain oxygen test.
The point of monitoring is not about showing off the figures. The point of monitoring is to be able to detect problems before it is too late.
When Continuing Higher Is the Wrong Decision
But there are occasions when proceeding to the next village is just plain wrong, no matter what the itinerary says.
Do not go any higher if the next lodge is full, the next group has gone ahead, you have a tight flight schedule, or you do not wish to cause trouble for the rest of the trekking team. None of these justifications take precedence over the way the body is responding to altitude.
When symptoms are getting worse, stopping, resting, and descending would have been the proper course of action. Losing one day or the whole day's trekking time can be inconvenient, but suffering from altitude sickness in the upper Manaslu Valley could have posed an even bigger threat.
Proper pre-planning will thus involve being prepared to adjust plans as necessary. It does not mean that the strongest trekker is the one who won't budge from the plan.
How to Prepare Specifically for the Manaslu Base Camp Side Trip From Samagaon?
Our MRT Manaslu Circuit Trek 2026 spring group enroute to Manaslu Base Camp
Manaslu Base Camp requires its own preparation because hikers tend to underestimate the side trip. They think of an "acclimatization hike" and think it's just a leisurely morning walk. Depending on the chosen route, it can turn into one of the harder treks before the pass.
Why Manaslu Base Camp Is Normally Added to the Circuit Rather Than Trekked Separately
In the context of a regular Manaslu Circuit itinerary, the Base Camp trek makes sense to be incorporated around Samagaon since you have to spend some time acclimatizing anyway before heading towards Samdo and the next higher stops.
It works out perfectly well that way. You climb up during the day, then descend, sleep low and continue the circuit. Thus, in the context of this blog, "preparation for Manaslu Base Camp" is preparation for this side trip within the Manaslu Circuit, not preparation for climbing.
What the Samagaon-Manaslu Base Camp Day Demands
The day will require far more climbing than the name “rest day” implies. The specific amount of walking depends on:
the point of return;
one’s own pace;
trail/snow conditions;
weather;
group acclimatization; and
number of breaks.
Consider it a true hiking day.
Do not hike out with just your cell phone and a half bottle of water because you are hiking back to the same teahouse.
What to Carry in Your Daypack
Get ready the night before. The pack should include:
drinking water;
water purification if necessary;
lunch/energy foods;
shell for rain/snow;
warmer clothing layer;
gloves;
warm hat;
sun hat;
sunglasses;
sunscreen;
lip balm;
trekking poles;
tissues/toiletries;
personal medications;
first aid;
phone/camera; and
extra food as an emergency backup.
UV exposure and cold temperatures are magnified by altitude, even if Samagaon is pleasant at breakfast.
Food and Water to Arrange Before Leaving Samagaon
Food and water should be sorted out for the Manaslu Base Camp Trek a day before, rather than believing you will be able to sort it out on higher ground. Check the breakfast timings and arrangements for lunch, along with the drinking water, with your guide or lodge owner in Samagaon. Have a full and energetic breakfast because it will give you energy to climb all day. Have food that you can eat while trekking, such as biscuits, nuts, chocolates, energy bars, dried fruits or a simple sandwich. Your appetite reduces with height, and it becomes difficult to find good food.
What Time Should You Start the Base Camp Hike?
Make sure that you start your journey to the Manaslu Base Camp early enough, giving yourself enough time for the climb and the journey back to Samagaon. It will be better to have an early start since afternoon weather becomes unpredictable, and you don’t want to have a late arrival at the peak and a hurried return down. You should check before you go to bed when you will have breakfast, depart, how long you will walk and what your turnaround time will be. Also discuss what will happen if visibility decreases, there is more snow, or you have altitude sickness symptoms.
When Weather, Snow or Acclimatization Should Override the Base Camp Plan
The Manaslu Base Camp trek should either be shortened or altogether avoided when factors suggest that the added altitude and effort involved will not prove wise. The presence of snow, declining visibility, and windy or hard trails can make moving on too risky. Health conditions are no less important. The one who has a headache, nausea, stomach problems, unusual fatigue, bad sleep alongside other altitude symptoms or lack of proper acclimatization may need rest at Samagaon more than an acclimatization trek. This base camp visit is only one part of the larger Manaslu Circuit tour. The key is to preserve energy and acclimatization for the further journey to Samdo, Dharamsala and Larkya La.
Why Reaching Base Camp Is Less Important Than Returning Well Acclimatized
The goal of visiting the Manaslu Base Camp is not just to climb as high as possible. This trek should allow you to get some good altitude experience but at the same time let you return to Samagaon in decent shape. Should you come back to Samagaon in an extremely dehydrated state, unable to eat or utterly exhausted, then this trek might have drained you more than it has helped. Climb at a moderate speed, make breaks before feeling extremely tired, consume snacks and drink water during the climb. Make a turn-back when it is justified by conditions or symptoms. Once back in Samagaon, rehydrate, eat well, dry out and rest.
Prepare for Larkya La Before You Ever Reach Dharamsala
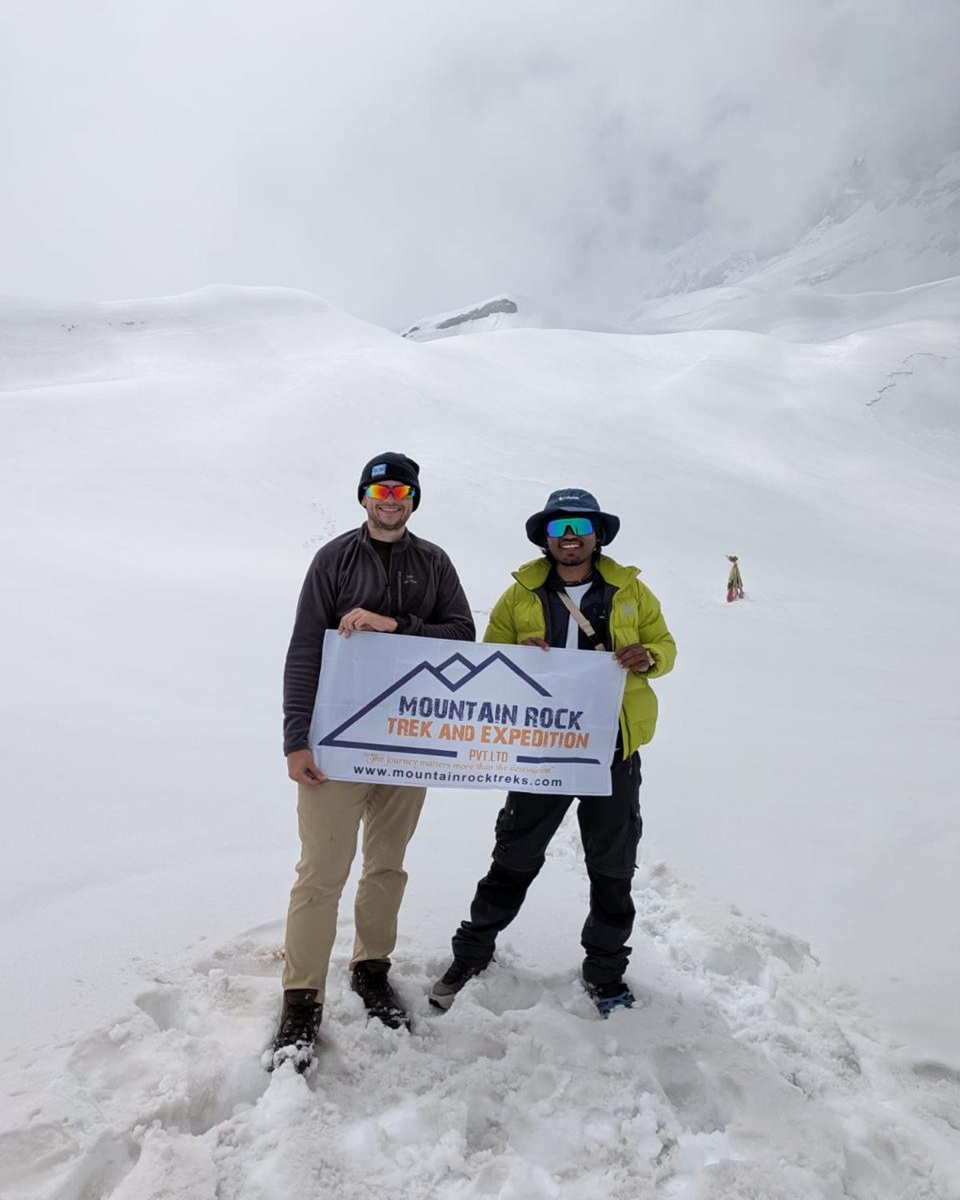
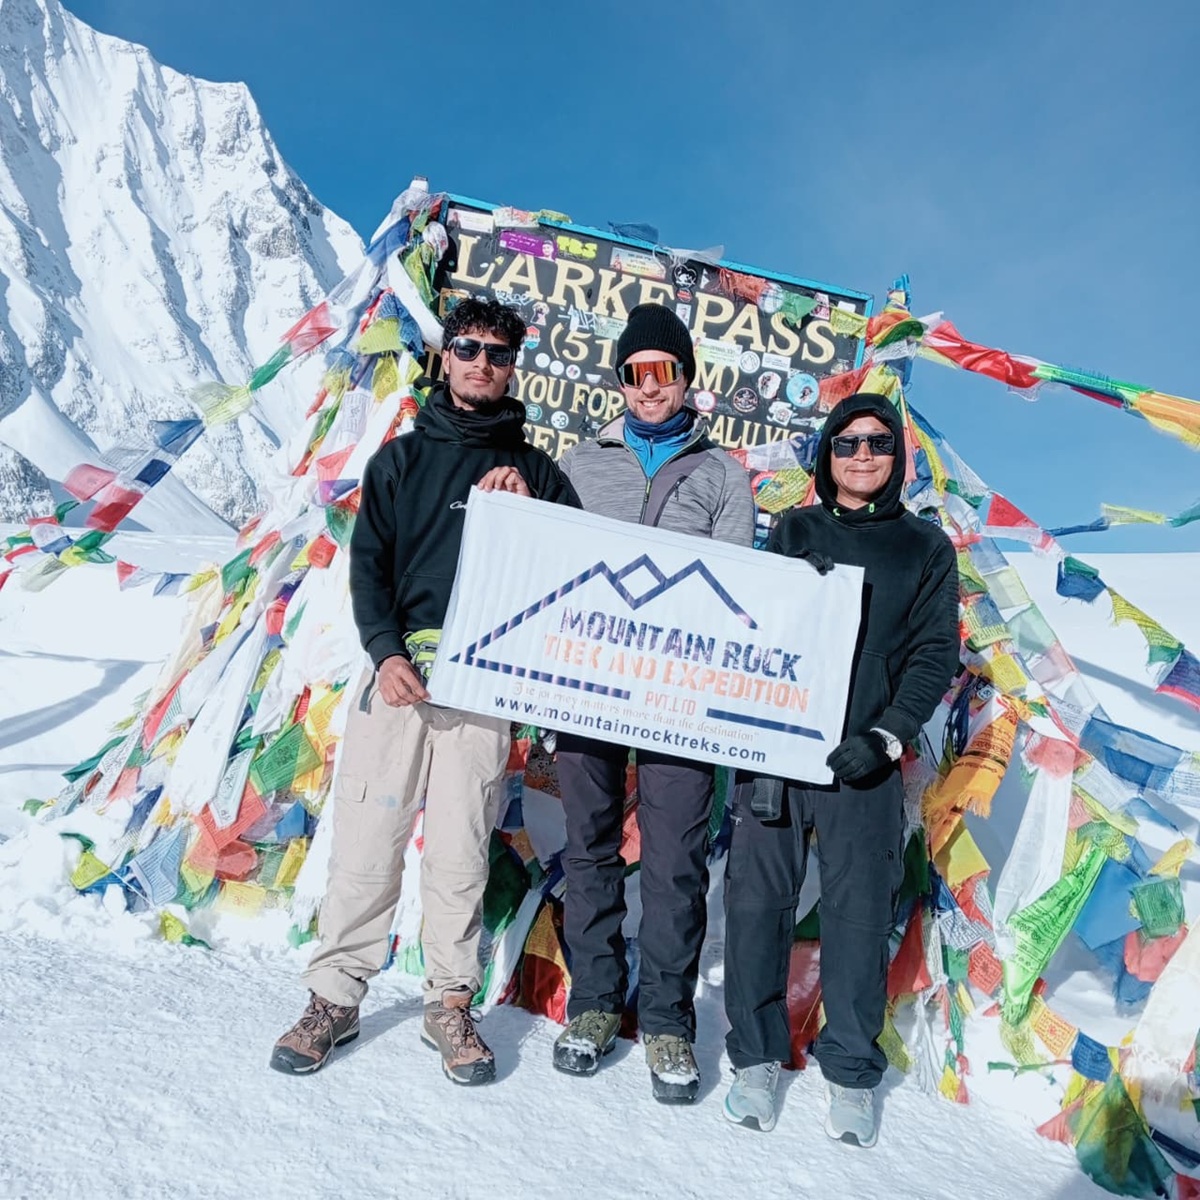
One of our successful MRT team members crossing and reaching Larke La Pass in autumn (September 2026) and posing for a photo
Don’t start getting ready for Larkya La at 4:30 in the morning on pass day.
Get ready the night before.
In fact, a number of things related to preparation should have happened weeks ago.
Your boots should already be worn in. Your headlamp should already have been tested out. You should already know which gloves work. You should already know whether your water bottle leaks. You should already know how your layers work together.
Larkya La morning is execution time, not experimentation time.
Why Larkya La Day Is Different From Every Other Trekking Day
Pass day is a combination of four things:
altitude + duration + cold + accumulated fatigue.
Each individually is manageable for a prepared trekker.
But all four together will reveal any sloppy preparation fast.
So the night before should be methodical.
What to Pack the Night Before Instead of in the Morning
Before sleeping, prepare:
In the Daypack
Shell jacket
Extra gloves (if brought)
Insulation layer (not worn at departure)
Accessible snacks
Water
Sunglasses
Sunscreen
Medication
Basic first aid
Power bank
Camera / phone equipment
Outside or To Be Worn
Boots
Trekking socks
Base layer
Trekking pants
Mid layer
Down jacket (if needed)
Warm hat
Gloves
Headlamp
Trekking poles
Goal: You should be able to wake up, dress, eat, and depart without unpacking the room.
Boots, Socks, Gloves, and Layers
Do not leave wet socks crumpled inside boots.
Do not find out on departure that one of your gloves is packed inside the porter duffel.
Do not pack your shell layer under five unnecessary items.
Keep essential layers accessible.
At high altitude and before dawn, minor organizational mistakes cost time and make people colder.
Headlamp and Battery Preparation for Early Departure
Check your headlamp before sleeping - do not just push the button for two seconds.
Water Preparation When Temperatures Are Below Freezing
Very cold conditions create another problem: water can freeze. Discuss with the guide how water will be prepared on the pass in the morning. Depending on equipment and conditions, options may include insulated bottles, hot/boiled water placed in suitable bottles or carrying containers in positions less exposed to extreme cold. Hydration tubes can be convenient at lower altitude, but exposed hoses can freeze in sufficiently cold conditions. Do not discover that your only water source is unusable halfway through the morning.
What Food Should Be Accessible Without Opening Your Main Bag?
Keep some small snacks handy which can be accessed easily without unpacking your backpack or rummaging through the main section. During the morning on Larkya La, you might be wearing gloves and several layers of clothing, and constantly unpacking snacks is a waste of time and will cause your body to cool down. Use hip belt pockets, jacket pockets, or the top pocket of your backpack for snacks like chocolate, biscuits, nuts, dried fruits, or energy bars that you have been able to tolerate during your training period. Eat small amounts before you are completely exhausted. The pass day is not an appropriate time to try any new gel, supplement, or high-energy snack that might upset your stomach at 5,000 m or higher.
How Slowly Should You Start the Pass Day?
Take it a little slower on the Larkya La day than your enthusiasm would like you to. This day will be very long, and a lot of tough walking is yet ahead. If you go fast in the beginning, you may risk wasting precious energy and increasing the strain on your breathing system, which can cause excessive sweating. Later, when you try to move slower, it can result in getting cold because of wet clothes. Short and stable steps will allow you to take breaths in a controlled way. Take off or unzip some clothes before you start sweating profusely, but put them back on during periods of rest when it is colder. Eat early and drink water regularly.
Prepare Mentally for the Descent After Reaching the Pass
Getting to the prayer flags at Larkya La is a key moment in the trek, but it is not the end of the trekking day. The trek will continue with a long downhill section all the way to Bhimthang, and with tired legs, it may not be as easy as one thinks. Trekkers are usually very excited about getting to the pass, but they lose patience when the trail starts going down. This is when the downhill practice you have done before comes into play. Go slow and take each step carefully, without getting too excited just because the altitude is going down.
How to Prepare for the Birendra Lake Side Hike From Samagaon?
Birendra Lake is among the shortest acclimatization hikes from Samagaon and is normally done on the additional day before the trekkers move to Samdo. The current route description indicates that Birendra Lake is located at about 3,690 m, which means that it is about 150-160 m above Samagaon. It takes about 1.5-2.5 hours to complete the hike in both directions. Although it is not difficult, you should treat it as a mountain hike and not a walk.
What to Carry for the Birendra Lake Hike
Only carry a smaller pack because the destination for the day will be Samagaon instead of any other lodge. Carry with you water, a little bit of food, some type of waterproof/wind proof shell, insulation, sunglasses, sunscreen, lip protector, hat, and personal medication. It is always helpful to have gloves in case it is a cold or windy season, and poles in case of slippery surfaces.
Take care not to carry your phone/camera under layers of clothing; instead, have it handy. Even in this short trek, do not leave behind any important medication or weather protection in your main luggage pack. Though the lake is near the village, there is no regular teahouse around the lake.
What to Eat and Drink Before Leaving Samagaon
Do have your normal breakfast instead of skipping breakfast, as the duration of this journey is not too long at all. The breakfast provided by the teahouse, along with enough fluids, should serve the majority of the tourists who visit Birindra Lake and travel back to Samagaon.
Carry some water with you and do not depend on other drinks that might be present near the lake. You can also carry some snacks which you normally enjoy. These snacks can include biscuits, chocolate, nuts, dry fruits, or even energy bars. This is because it will serve you well, as you may stay long enough to click photos of the beautiful lake.
Footwear, Clothing and Weather Preparation
Wear your usual broken-in trekking boots and trail shoes that you would wear on the Manaslu Circuit trek. You should not trade your hiking footwear for sandals or lodge slippers just because you are in proximity to Birendra Lake. This trek is easy by Manaslu standards, but it does take place outdoors on the mountainous terrain, and some parts of it might be slippery, wet, and rough.
Layer up. Pack enough clothes to keep you warm enough, but don't overpack, as there will be a lot of climbing. Have some shell or light insulated layer at hand, as it might be substantially cooler to stand next to the lake than to hike. Sunglasses and sunblock are still required at this altitude.
How to Walk the Birendra Lake Acclimatization Hike
Consider the walk an acclimatization activity rather than a speed race. Move at a consistent speed and use small steps when the path gets elevated while maintaining control of your breathing. With respect to the little elevation, Birendra Lake becomes the less challenging choice for a Samagaon acclimatization trek compared to Pungyen Gompa or Manaslu Base Camp.
Inform your guide in case you experience severe headache, nausea, dizziness or unexpected weakness instead of disregarding the signs due to the fact that the walk is short. The idea of taking the walk is to get some exposure to high altitudes and descend to the same sleeping altitude in Samagaon.
What to Do After Returning to Samagaon
When you're back, take some water and food to have your next meal and change your clothes if they are wet. Take care of your feet, dry all the wet gear and use the rest of the afternoon to recover. Consider your appetite, headache, nausea, abnormal fatigue, and ability to recover from the brief exposure to altitude.
The significance of Birendra Lake is not just reaching the lake. The trek provides trekkers a good opportunity to acclimatize before moving to Samdo through Samagaon and then on to Larkya La Pass.
Preparation for the Pungyen Gompa Side Hike From Samagaon
Unlike the Birendra Lake hike, which takes only two or three hours round trip, there is more preparatory work involved in Pungyen Gompa, as it is an appropriate day's acclimatization walk. The existing information on the route states that the total time of the walk is about 5-7 hours return trip from Samagaon, with the monastery located at an altitude of 4,000-4,060 m.
In the case of you being a package trekker, the decision concerning the time, route, and weather conditions is made by the guide. The only task that you have is to come for breakfast fully rested and appropriately dressed and equipped for the day's walk.
Evening Preparation in Samagaon
Pack up for Pungyen Gompa in the evening before going to bed instead of rushing things in the morning after breakfast. Get your worn-in trekking boots, socks, trekking pants, base layer, and walking clothes sorted out. Have your shell jacket, warm layer, sunglasses, sunscreen, gloves, hat, and trekking poles easily accessible for the next morning.
The daypack will be lighter than your usual moving day pack since the main duffel will stay behind in Samagaon. But this is not the place to pare down your pack to just a water bottle and camera. The upper section is more exposed, and the current route descriptions state that the landscape will change from forest and farmland to alpine terrain.
A good setup would be:
Prepare before bed
Keep accessible during the hike
Boots and trekking socks
Water
Trekking trousers/base layer
Snacks or packed lunch
Shell jacket
Sunglasses and sunscreen
Warm mid or insulated layer
Gloves and hat
Trekking poles
Personal medication
Charged phone/camera
Shell or warm layer
Food, Water and Daypack Setup
A good breakfast is necessary at Samagaon as it takes longer to walk to reach Pungyen Gompa. The carbohydrate-rich lodge food, which you are already used to, will do better for you as compared to high-energy foods which you may not have eaten before.
It would be necessary to bring enough water supply for many hours and to clarify with the guide whether there is any chance of refilling the bottles along the intended route. Do not think that you will find a tea house wherever you may need food or drinks.
It is important to keep some snacks handy, easily reachable in the daypack. Nuts, cookies, chocolate, dried fruits, or an energy bar - whatever you know - will do the trick together with your breakfast and your lunch plan.
The daypack must also have the following items: a waterproof or windproof shell, a warm top, sunglasses, suncream, lip balm, medicine and simple tools for blisters. The hike to Pungyen Gompa is a cultural and acclimatization side trip, but the fact that you are going to spend some time away from Samagaon makes small omissions particularly annoying.
Pacing, Clothing and Trail Preparation
The hike must be treated as an acclimatization day, not as a fitness test. Samagaon stands at about 3,500 meters above sea level, and Pungyen Gompa is commonly said to be situated at 4,000 meters and even higher.
Proceed with caution and keep a controlled pace during the first hour. Small uphill steps tend to be more energy-efficient than big jumps again and again. If you get hot, change layers before your base layers get totally soaked with sweat.
The path gets more open and alpine scenery-wise as we ascend. According to some descriptions, the section approaching the monastery is quite steep and rocky in comparison to the lower trail. So trekking poles would definitely help out many hikers, especially while descending or on wet terrain.
Don't take off all warm layers from the pack just because Samagaon seems pleasant to hike out from. Hiking creates heat, whereas standing next to the gompa for pictures or lunch doesn't create any.
Altitude Awareness During the Pungyen Gompa Hike
Firstly, Pungyen Gompa is helpful since it gives trekkers an opportunity to ascend further up in the day and go back to the sleeping height at Samagaon at night, and hence is a better acclimatization exercise than the Birendra Lake trek for people feeling fine on the first night spent in the village.
Remember the aim is not to tire yourself out.
Report to your guide if you experience headaches, dizziness, nausea, excessive weakness, or any other symptom different from walking fatigue. There is no point in hiding symptoms just because all other trekking members continue to be comfortable.
Drink enough and eat before you feel excessively tired. The fatigue created by a five- to seven-hour side trek itself may be enough without any symptoms of altitude sickness, so try to differentiate between usual fatigue and the one that is worsening.
It is up to the guide to decide whether to continue or turn back, while your task is only to report how you feel.
Dipak starts to step up from porter, guide, and trekking leader to the company owner. Sometimes he share his experience with others as well as wrote in local travel news. Most of time he spend his time on mountain and his company.